Good Search

Labels

Showing posts with label Android. Show all posts

Thursday, April 12, 2012

Discovery about Launcher on Android 4.x (Ice Cream Sandwich) Part4


Launcher part 4

Layout Simple Overview
<com.android.launcher2.AppsCustomizeTabHost>
          <LinearLayout>
               <FrameLayout>
                    <com.android.launcher2.FocusOnlyTabWidget/>
               <include android:id="@+id/market_button"/>(TextView)
           </FrameLayout>
           <FrameLayout>
               <com.android.launcher2.AppsCustomizePagedView/>
           </FrameLayout>
     </LinearLayout>
</com.android.launcher2.AppsCustomizeTabHost>
The mapping between user view and actual code

How to add an new app icon into the application list in launcher ? Or what is the process ?
Following my habit : See the map of call-stacks !


Special Case/Idea

Do you want to replace the position of ap icon in Application List ?
Original Rule of Order is by the rank of Letters.
But, you can …swap the position of the first icon with the second one.(Red Part)
AppsCustomizePagedView.java (..\packages\apps\launcher2\src\com\android\launcher2)
public void setApps(ArrayList<ApplicationInfo> list) {
mApps = list;
ApplicationInfo list1 = mApps.get(0);
mApps.set(0, mApps.get(1)); // 0 -> 1
mApps.set(1, list1); // 1 -> 0
}
P.S this just is one of methods to achieve it.

The ScreenShot before modifying:


The ScreenShot After modifying:


Part 4 is over
The discovery about Launcher is really finished!!!
Thank you for your patient reading

Discovery about Launcher on Android 4.x (Ice Cream Sandwich) Part3


Launcher Part 3

How to set Wallpaper from apps?
Send Intent to start suitable Activities.
1. Without the option of set default wallpaper
final Intent pickWallpaper = new Intent(Intent.ACTION_SET_WALLPAPER);
Intent chooser = Intent.createChooser(pickWallpaper,getText(R.string.chooser_wallpaper));
startActivityForResult(chooser, REQUEST_PICK_WALLPAPER);


2. With the option of set default wallpaper
final Intent pickWallpaper = new Intent(Intent.ACTION_SET_WALLPAPER);
startActivityForResult(pickWallpaper, REQUEST_PICK_WALLPAPER);


How receivers(Activities) should setup their AndroidManifest.xml ?
They all must setup user-permission for set wallpaper.
<uses-permission android:name="android.permission.SET_WALLPAPER" />
AndroidManifest.xml (..\packages\apps\gallery2)
    <activity android:name="com.android.gallery3d.app.Wallpaper"
    <intent-filter android:label="@string/app_name">
    <action android:name="android.intent.action.SET_WALLPAPER" />
    <category android:name="android.intent.category.DEFAULT" />
    </intent-filter>
    </activity>
AndroidManifest.xml (..\packages\apps\launcher2)
    <activity android:name="com.android.launcher2.WallpaperChooser">
    <intent-filter>
    <action android:name="android.intent.action.SET_WALLPAPER" />
    <category android:name="android.intent.category.DEFAULT" />
    </intent-filter>
    </activity>
AndroidManifest.xml (..\packages\wallpapers\livepicker)
    <activity android:name="LiveWallpaperActivity">
    <intent-filter>
    <action android:name="android.intent.action.SET_WALLPAPER" />
    <category android:name="android.intent.category.DEFAULT" />
    </intent-filter>
    </activity>

How to select a picture to set a Wallpaper?
You can porting codes , such as …
InputStream in = new FileInputStream(new File("/mnt/sdcard/xxx.jpg"));
WallpaperManager wpm = (WallpaperManager) getSystemService(Context.WALLPAPER_SERVICE);
wpm.setStream(in);

And, other ideas : changing different wallpapers in a period of time.

Handler: transfer messages about updating ui in sub-thread to main-thread or make a timer for ui.
Runnable mTasks = new Runnable(){ ui codes you wanted to repeat…}
handler.postDelayed(mTasks, 500); // 500 is a time to repeat

Updating your UI in non main-thread:
Activity Activity or others(Fragment)
Handler and Message
Or
runOnUiThread(new Runnable(){
public void run(){
// update ui view
}
});
Handler and Message
Handler and Message:
1.
Handler handler = new Handler() {
     public void handleMessage(Message msg) {
          switch (msg.what) {
              case XXX.MSG:
                 // update ui view
                 break;
          }
           …
      }
};
2.
class handler extends Handler
{
      @Override
      public void handleMessage(Message msg) {
               switch (msg.what) {
                     case XXX.MSG :
                         // update ui view
                     break;
               }
      }
}
handler hd = new hander();

Special Class : The Difference between LocalService and RemoteService
Source: http://developer.android.com/guide/topics/fundamentals/services.html
Service is an application component that can perform long-running operations in the background and does not provide a user interface. Another application component can start a service and it will continue to run in the background even if the user switches to another application. Additionally, a component can bind to a service to interact with it and even perform interprocess communication (IPC). For example, a service might handle network transactions, play music, perform file I/O, or interact with a content provider, all from the background.
A service can essentially take two forms:
Started(LocalService)
A service is "started" when an application component (such as an activity) starts it by calling startService(). Once started, a service can run in the background indefinitely, even if the component that started it is destroyed. Usually, a started service performs a single operation and does not return a result to the caller. For example, it might download or upload a file over the network. When the operation is done, the service should stop itself.
Bound(RemoteService)
A service is "bound" when an application component binds to it by calling bindService(). A bound service offers a client-server interface that allows components to interact with the service, send requests, get results, and even do so across processes with interprocess communication (IPC). A bound service runs only as long as another application component is bound to it. Multiple components can bind to the service at once, but when all of them unbind, the service is destroyed.
Although this documentation generally discusses these two types of services separately, your service can work both ways—it can be started (to run indefinitely) and also allow binding. It's simply a matter of whether you implement a couple callback methods: onStartCommand() to allow components to start it and onBind() to allow binding.
Regardless of whether your application is started, bound, or both, any application component can use the service (even from a separate application), in the same way that any component can use an activity—by starting it with an Intent. However, you can declare the service as private, in the manifest file, and block access from other applications. This is discussed more in the section about Declaring the service in the manifest.
LocalService
RemoteService

Part 3 is over
Thank you for your patient reading

Discovery about Launcher on Android 4.x (Ice Cream Sandwich) Part2

Launcher part 2 Widget & Hotseat
Framework for Widget

You could setup your widget in AndroidManifest.xml of app.

<manifest xmlns:android="http://schemas.android.com/apk/res/android"
package="com.mywidget.app">
<application android:icon="@drawable/icon" android:label="@string/app_name">
<receiver android:label="@string/app_name" android:name="com.mywidget.app.WidgetReciver">
<intent-filter>
<action android:name="android.appwidget.action.APPWIDGET_UPDATE"/>
<action android:name="android.appwidget.action.APPWIDGET_DELETED"/>
<action android:name="android.appwidget.action.APPWIDGET_DISABLED"/>
<action android:name="android.appwidget.action.APPWIDGET_ENABLED"/>
</intent-filter>
<meta-data
android:resource="@xml/my_widget_provider" >
</meta-data>
</receiver>
</application>
</manifest> 

And design the look of widget here.

main.xml
<LinearLayout xmlns:android="http://schemas.android.com/apk/res/android"
android:orientation="horizontal">
<ImageButton
android:id="@+id/Button01"
android:background="@drawable/bloodeye" />
<ImageButton
android:id="@+id/Button02"
android:background="@drawable/bloodeye" />
</LinearLayout>

my_widget_provider.xml
<appwidget-provider xmlns:android="http://schemas.android.com/apk/res/android"
android:minWidth="110dp"
android:minHeight="110dp"
android:updatePeriodMillis="1000"
android:initialLayout="@layout/main"
/>

Size: The cells of widget


# of Cells Available Size (dp)
1
40dp
2
110dp
3
180dp
4
250dp


Screenshot

Operation Framework of Widget in Launcher: 
how to drag your widget and remove it later.


HotSeat.xml

<com.android.launcher2.Hotseat
       launcher:cellCountX="5"
       launcher:cellCountY="1">
       <com.android.launcher2.CellLayout android:id="@+id/layout"/>
</com.android.launcher2.Hotseat>

Modify the default shortcus fo HotSeat(Red Parts)
Default_workspace.xml
<!-- Hotseat (We use the screen as the position of the item in the hotseat) -->
<favorite
launcher:packageName="com.android.contacts“
launcher:className="com.android.contacts.activities.DialtactsActivity"
launcher:x="0"
launcher:y="0" />
<favorite
launcher:packageName="com.android.contacts“
launcher:className="com.android.contacts.activities.PeopleActivity"
launcher:x="1"
launcher:y="0" />
<favorite
launcher:packageName="com.android.mms“
launcher:className="com.android.mms.ui.ConversationList"
launcher:x="3"
launcher:y="0" />
<favorite
launcher:packageName="com.android.browser“
launcher:className="com.android.browser.BrowserActivity"
launcher:x="4"
launcher:y="0" />
</favorites>


Drag a widget into another one -> addFolder


Part 2 is over
Thank you for your patient reading

Wednesday, April 11, 2012

Discovery about Launcher on Android 4.x (Ice Cream Sandwich) Part1-2

Launcher 1-2
A upper-layer Framework of Launcher

DragIcon : Read a graph and Describe your scenario

Scroll Pages : Read a graph and Describe your scenario


How to exchange the default wallpaper?
..\frameworks\base\core\res\res\drawable-nodpi\default_wallpaper.jpg
WallpaperManager.java (frameworks\base\core\java\android\app)
      private Bitmap getDefaultWallpaperLocked(Context context) {
      try {
             InputStream is = context.getResources().openRawResource(
             com.android.internal.R.drawable.default_wallpaper);
              ...

The icon matrix of launcher
You can define these parameters to decide the size of matrix.
0,0
1,0
2,0
3,0
0,1
1,1
2,1
3,1
0,2
1,2
2,2
3,2
0,3
1,3
2,3
3,3

public Workspace(Context context, AttributeSet attrs, int defStyle) {
       super(context, attrs, defStyle);
       …
       // if the value is manually specified, use that instead
       cellCountX = a.getInt(R.styleable.Workspace_cellCountX, cellCountX);
       cellCountY = a.getInt(R.styleable.Workspace_cellCountY, cellCountY);
       mDefaultPage = a.getInt(R.styleable.Workspace_defaultScreen, 1);
       public CellLayout(Context context, AttributeSet attrs, int defStyle) {
       … 
       mOriginalCellWidth =
       mCellWidth = a.getDimensionPixelSize(R.styleable.CellLayout_cellWidth, 10);
       mOriginalCellHeight =
       mCellHeight = a.getDimensionPixelSize(R.styleable.CellLayout_cellHeight, 10);

Part 1 is over
Thank you for your patient reading

Tuesday, April 10, 2012

Discovery about Launcher on Android 4.x (Ice Cream Sandwich) Part1-1


Launcher 1-1
Launcher – is the first visible application
AndroidManifest.xml
<application>
<activity
android:name="com.android.launcher2.Launcher"
android:launchMode="singleTask"
android:screenOrientation="nosensor">
<intent-filter>
<action android:name="android.intent.action.MAIN" />
<category android:name="android.intent.category.HOME" />
<category android:name="android.intent.category.DEFAULT" />
<category android:name="android.intent.category.MONKEY"/>
</intent-filter>
</activity>
<activity
android:name="com.android.launcher2.WallpaperChooser">
</activity>
<activity android:name="com.android.launcher2.RocketLauncher"
android:label="@string/dream_name"
android:theme="@android:style/Theme.Black.NoTitleBar.Fullscreen">
</activity>
</application>
singTask: keep only one ap in the same time
MAIN: identify the entry activity
HOME: This is the home activity, that is the first activity that is displayed when the device boots.
DEFAULT: other aps can execute this ap by startActivity..
MONKEY: This activity may be exercised by the monkey or other automated test tools.

android:theme="@android:style/Theme.Black.NoTitleBar.Fullscreen"
the using matrix to modify your layout of activity
Status/Title
On
Status: On
Title: Off
FullScreen
Theme
Theme.NoTitleBar
Theme.NoTitleBar.Fullscreen
Theme.Black
Theme.Black.NoTitleBar
Theme.Black.NoTitleBar.Fullscreen
Theme.Light
Theme.Light.NoTitleBar
Theme.Light.NoTitleBar.Fullscreen
Theme.Tranucent
Theme.TranslucentNoTitleBar
Theme.Translucent.NoTitleBar.Fullscreen
<com.android.launcher2.DragLayer>
<!-- The workspace contains 5 screens of cells -->
<com.android.launcher2.Workspace
launcher:defaultScreen="2"
launcher:cellCountX="4"
launcher:cellCountY="4">
<include android:id="@+id/cell1" layout="@layout/workspace_screen" />
<include android:id="@+id/cell2" layout="@layout/workspace_screen" />
<include android:id="@+id/cell3" layout="@layout/workspace_screen" />
<include android:id="@+id/cell4" layout="@layout/workspace_screen" />
<include android:id="@+id/cell5" layout="@layout/workspace_screen" />
<!--define 5 pages in launcher-->
</com.android.launcher2.Workspace>
<include
android:id="@+id/qsb_bar"
layout="@layout/qsb_bar" />
<include layout="@layout/hotseat"
android:id="@+id/hotseat"
android:layout_width="match_parent"
android:layout_height="@dimen/button_bar_height_plus_padding"
android:layout_gravity="bottom" />
</com.android.launcher2.DragLayer>

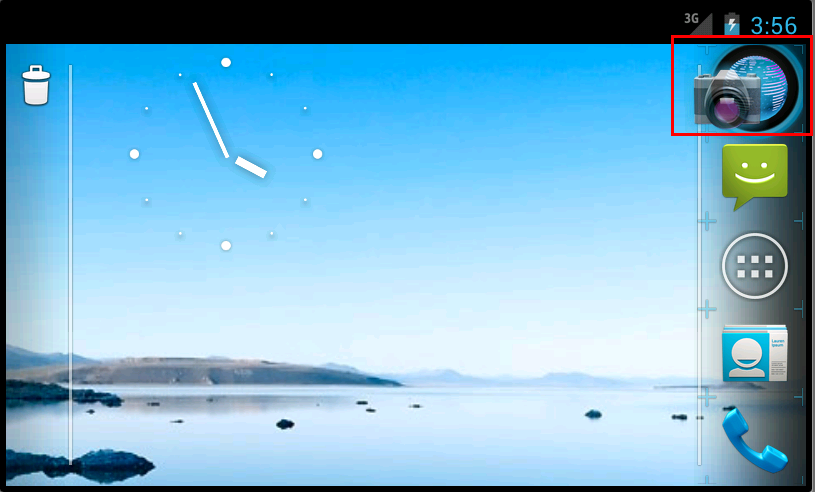
UI Introduction: HotSeat & SearcherBar


 Defining the real problem from user’s operations


When you have a problem , what is your method to solve it?


Hurry up !    
Use some programs(Source Insight) to search keywords to help yourself find the call stacks.   
But, if the problem is complex and difficult , you need more time to memo some infors for your weak ability of memory.   
My ability of memory is limitative ,so I decide to use the stupidest method!   


Connecting all call stacks I reviewed and try to find their relations on the paper.   
However, so many words about call stacks are easy to forget most contents later for me.   So, I decided to paint them !


The difference between word and graph for describing the problem:
1. If the problem is more complex , your words to explain are much more .
     the plenty of continuing data is possible to interrupt our memory in brain.
2. Please follow your thinking method of brain :
    Connecting all data -> how to derivative their relations -> how to be easy to associate with them.

Part 2 will be coming soon ...